This review of the “Evolution of the MetaMoreFore” is a bit more detailed than my review of the Evolution of the DILE (linked) mainly because it is all so fresh in my mind!
~2013
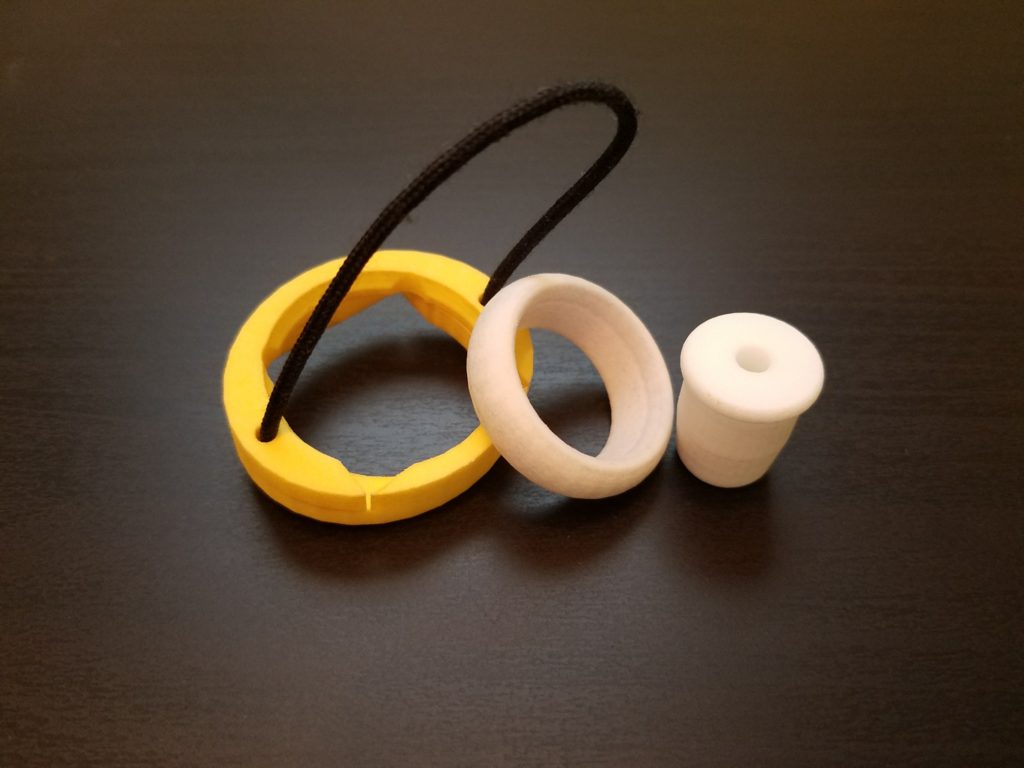
The idea for the MetaMoreFore sprang from a small side device/system I developed in ~2013. It used a ring around the shaft skin (made from an electrical conduit connector), a cup shaped funnel (made from a plastic Easter egg – I think) and a small “super ball.”
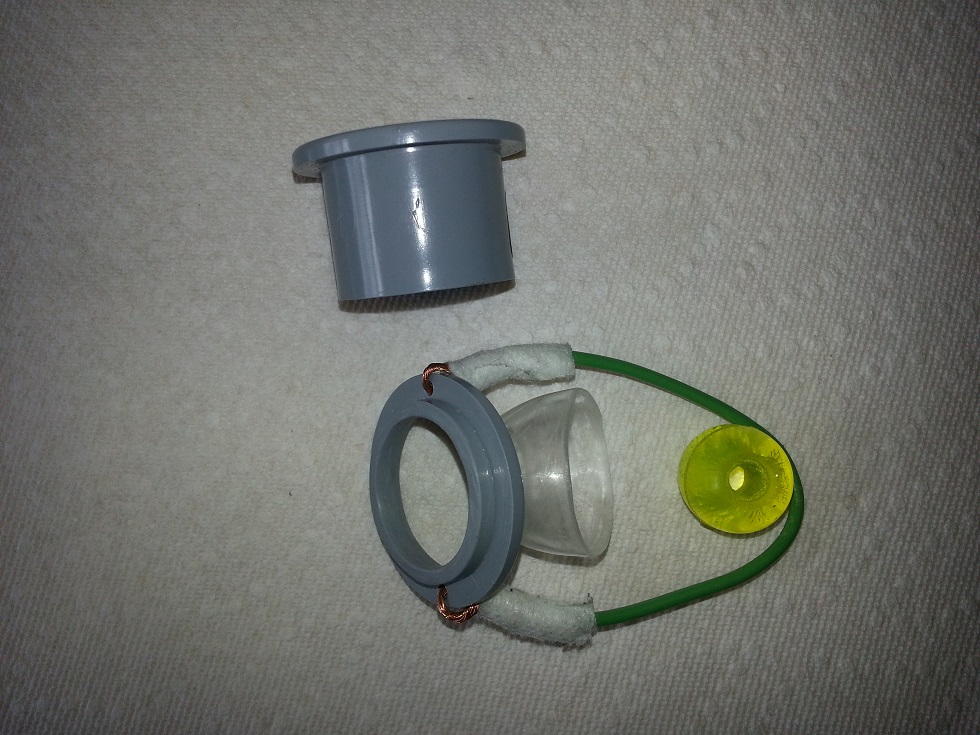
The ring would be slid over the shaft skin (skin tube), the funnel would then be slid over that, any/all available “skin tube” would be brought up through the funnel and then rolled down the outside of this contraption and held (tensioned) in place by the ball. It was then (quickly!) strapped to the waist or leg. Am image of the ELID in use can be found at the very bottom (section 3; Historic Images) of the MMF password protected page (The Configurations of the MMF system; linked).
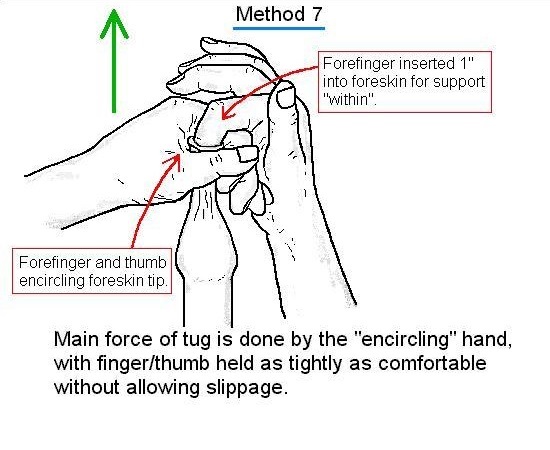
The tensioning of the system was similar to what you would get with one of the manual approaches #7 (linked), where you would put your finger into the skin tube, then with the other hand, hold the skin in place and then PULL!). The below image was obtained from the webiste, Manual Methods of Foreskin Restoration (linked).
I pursued the development of this system/device because I liked the “inner skin” focusing that could be obtained from Method #7, but wanted to maintain that tensioning for more than the few minutes one could achieve with hands alone. Additionally, as much as I introduced (in 1998) the idea of dual-tension (now called “bi-directional), with the DILE (linked) (www.dileinsert.com), I did not like the regular “compression” against the glans, so, I wanted to try something different.
I called this new device/system the ELID (Exclusive Lengthener of Inner foreskin Device) since it tensioned the skin in the OPPOSITE direction of the DILE (yes, that name was really FORCED to get DILE spelled backwards! – LOL) and also could really focus on inner skin.
I used the ELID for ~1 year, had really good results and then…..
~2014
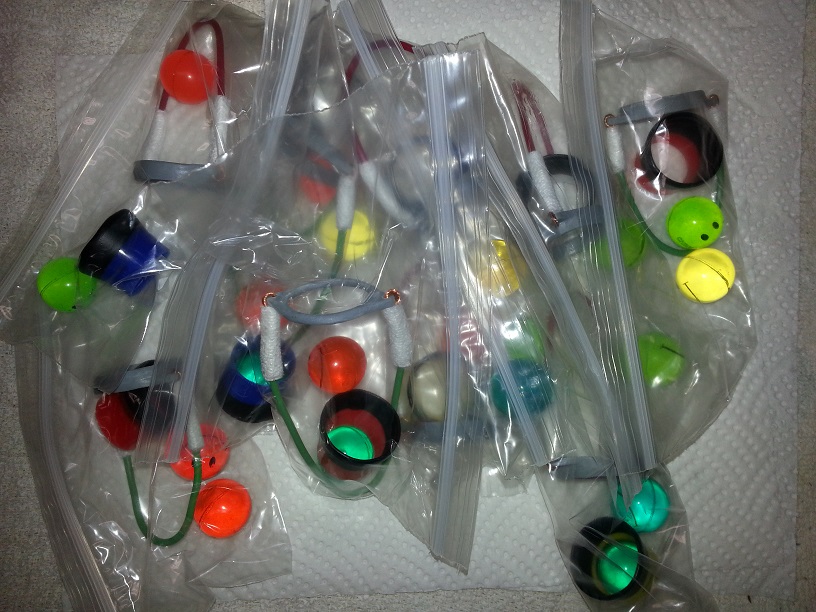
….I decided to conduct a “pseudo-clinical trial.” I resigned the ELID (a little) to help mass produce it (the Easter egg was replaced with a cone shaped plastic cap), I made up 10 sets (I provided two balls, just in case one bounced away!), found 10 willing participants and we got started! I sent the packages out, they took regular measurements, reported back and we kept this up for 18 weeks. In the end, only ~5 stayed “with the program.” But I expected some attrition, that was why I started with 10!
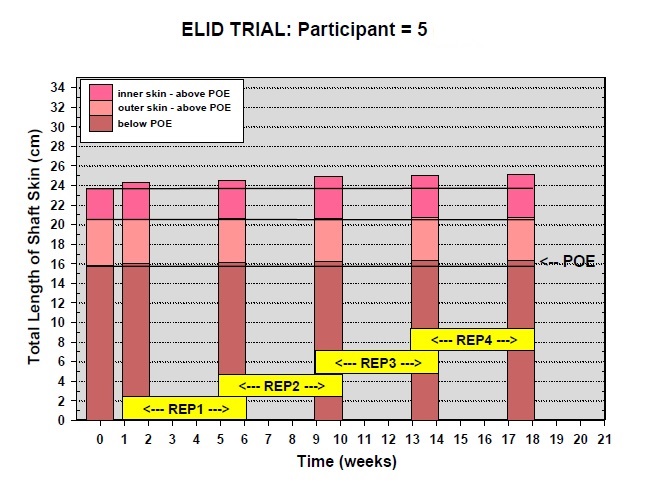
Below are a couple of graphs from two of the participants (#3 and #5) and, it appeared as through, indeed, they both had good progress (over the course of 18 weeks) with increasing overall skin (+~4 cm total for #3 and +~1.5 cm for #5), as well as increasing inner skin (both participants exhibited an increase of ~1 cm of inner skin). I provide these graphs simply as “antidotes” of possible usefulness of the ELID; other participants were not as “prolific” with their growth. [note: in the below graphs, REP stands for “Restoration Effort Period”].

As much as the ELID seemed useful, it had many draw backs: skin would slip out from between the ball and cone, the device would fall apart if the tension was released (balls would go bouncing around) and, of course there was the ever present (with most other devices) need for removal and re installation for “bathroom breaks.” Also, it required strapping – SOMETHING I REALLY HATED!
The ELID “died” (in my mind) soon after the “experiment” was complete.
~2015
I then moved onto various “inflation” methods and devices. But to me they were not only WAY too involved and I did NOT like the “exertion” of force (expansion) in all directions. Also “leaking” of air (decreasing the tension) was a royal PAIN!
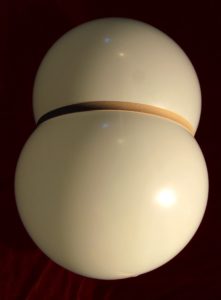
However, during my experimentation inflation people were suggesting using a “collar” of sorts made from either tape, “pre-wrap” or Velcro to focus the air to stay towards the bottom of the skin tube, so as to only allow “inner skin” to expand. Indeed, a picture would be worth 1000 words here. The best I can do is this picture of a balloon with a rubber band around it. Imagine if the rubber band in the below picture was MUCH WIDER (and constricted the top half of the balloon). If this were the case, only the bottom half of the balloon would be free to expand. That was the idea behind these “collar” approaches with inflation.
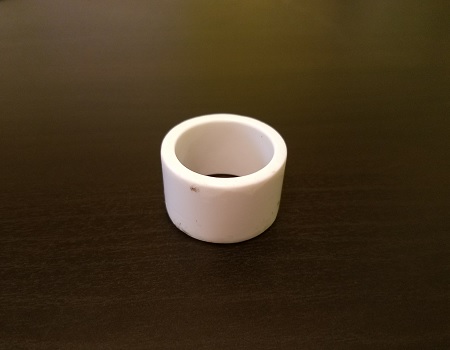
My approach to this “collar” idea, was, indeed, first using tape, then “pre-wrap,” then Velcro. But (to me) ALL were annoying! I then decided to use a small length of PVC (slid down upon the skin tube prior to installing other components of whatever inflation device I was trying to use).
This indeed worked to focus the air and expansion of only “inner” skin, but I still found the “leaking” of air to be a pain.
It then occurred to me that I could use this same ring (or collar) of PVC with the ELID approach! I could slide this ring of PVC down over the skin tube, set the other parts of the ELID (ring, cone, ball; see above) and this PVC ring could help provide some “back tension” (between the glans and the main parts of the ELID).
Then one day a LIGHTENING BOLT of inspiration hit me!
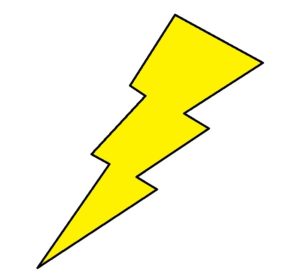
If I cut that ring of PVC in half, and made another ring (with a portion missing – like a “C”), I could slide this 3rd ring (C-ring) in between the two shorter ones and past the skin tube, since a portion of it was missing (!), thereby further increasing the TENSION on the entire system….
THE IDEA OF THE METAMOREFORE WAS BORN!
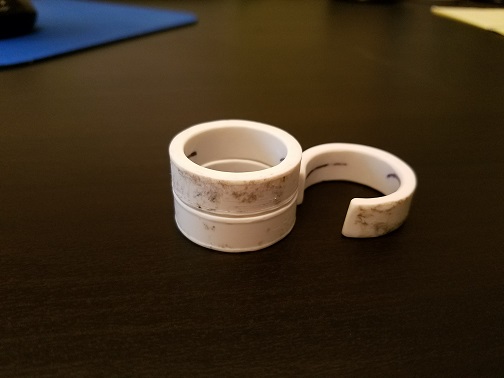

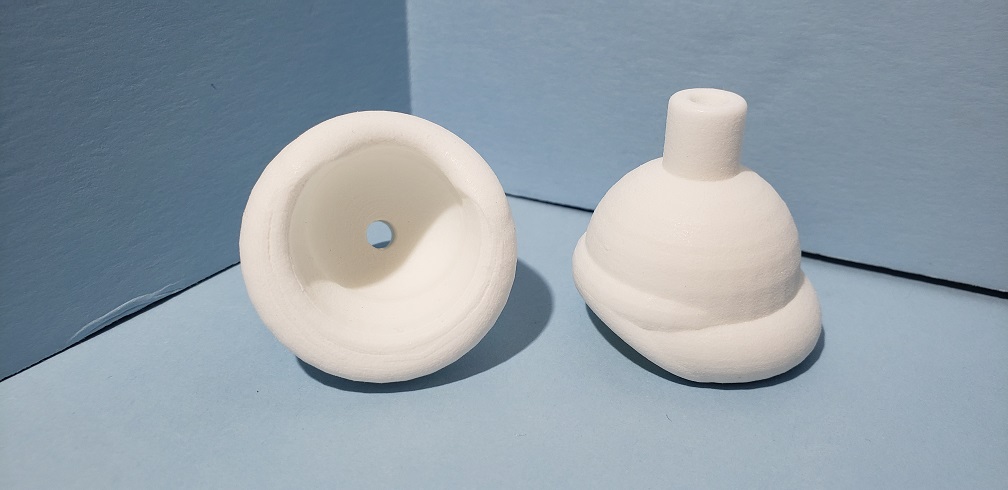
I then proceeded to redesign the entire ELID. The funnel/cone at the top had to be compatible with the PVC rings (see below) and the edge of the bottom ring of PVC could NOT be exposed to DIG into the shaft skin (the glans would be right on the other side). I resolved this issue by simply making a second funnel/cone (the same design as the top, except in this case, it was covered with some cloth tape) and just turned it upside down.
In this picture, you will see the first versions of what I now call the Top and Bottom “End Rings”, two (2) “Set Rings” (one ~1 cm tall another ~2 cm tall) and one (1) “Expansion Ring” (or “C” ring ~1 cm tall). Around this time I also realized that if I replaced that ball with a small funnel, that, perhaps, this WHOLE THING could be left “in place” while using the man’s room (#1 – in a STALL of course!). After many FAILED attempts, the funnel (shown below) that seemed to work best was fashioned from the “working end” of a baby-nose-cleaner-sucker-thing! LOL.
Installing and wearing this was a PAIN since I need to use tape to keep all the rings together (hence the grungy appearance = tape residue).
I then recalled one of my kids toys when they were younger! MARBLE RUN!
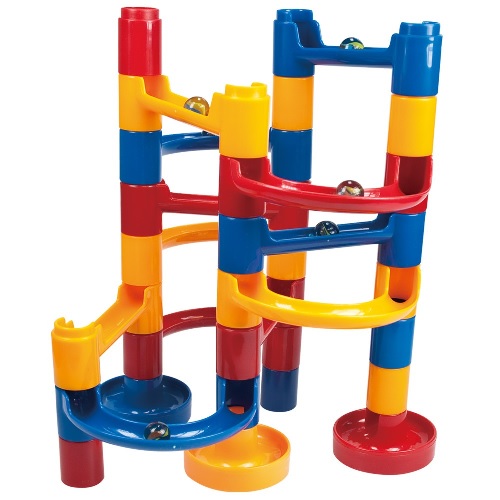
This toy consists of a bunch of connecting ramps/tubes that STACKED upon one another, and were held in place by a small “tab” on the top of each tub that would fit into a “recess” on the bottom of other tubes!
Around this same time I had been communicating with a previous ELID tester (tenchi25 from Tally’s forum) regarding our common interests in inflation methods and he mentioned that he had access to a 3D printer for making his own “prototypes.”
I asked if he would be able to print me something if I got him a design. He agreed! I then put pen to paper and came up with the below design! The Base Rings are what I call now the “Set Rings.” The “Expansion Rings” kept their original name.

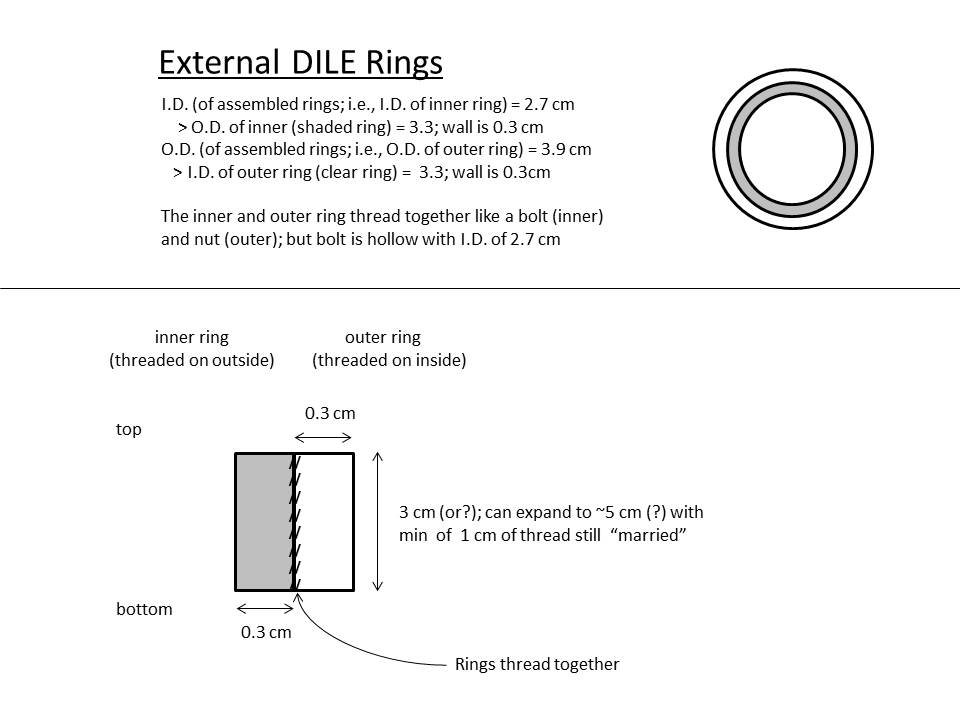
I also came up with the idea for the the External DILE Rings (now called “DILEd Ring”) based on the “dile” idea (www.dileinsert.com) and put this design together.
I then realized that it was WAY TOO MUCH to ask someone else to try and convert the above “2D” ideas into a “3D” realities! I needed to it myself.
I found an online “3D” design program, did the best I could, got him a file to print (of just the “Base Rings”), and a few weeks later, these arrived!
It certainly was a “proof in concept” but I had a LOT of work to do to fine tune these designs! I then decided that I needed to buy myself a small 3D printer (got a M3D for ~$300), rather than keep sending files to my “printer guy.”
~2016
I then got busy with re-designing, printing, trying it out, re-re-designing, re-printing, trying it out again, re-re-re-designing, re-re-printing, trying it out YET again, etc…!
Here is a video of one of the “printing sessions”
After much trial and error, I had a very useful home printed prototype!
~2017-2018 & 2019
And as my “CAD” design skills developed, the ideas just kept coming!
- A ring to tension the device to the waist (like the original ELID had)
- Rings that were “wedged” to focus tension on a particular side
- Rings that were made out of metal (since the 3D printing company could DO THAT!) so as to have a “weighted” option
- Components to make the system “bi-directional” (this was not something I particularity wanted to use, but figured some might).
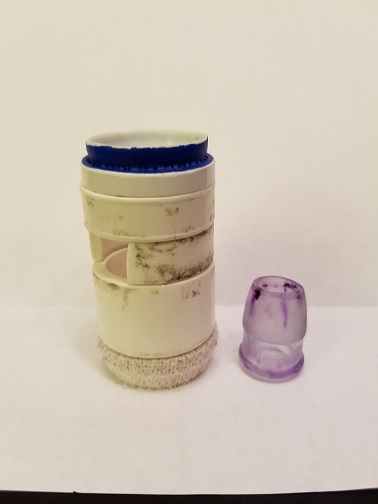
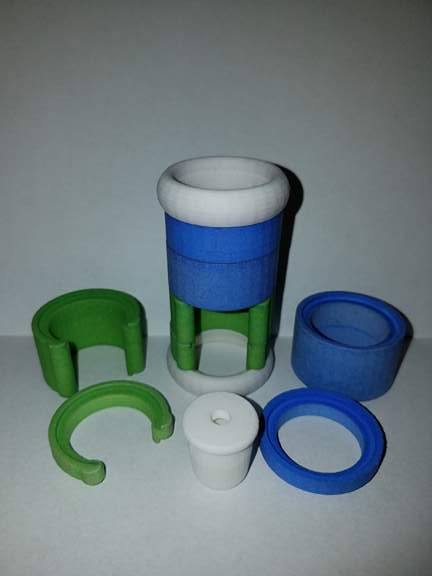
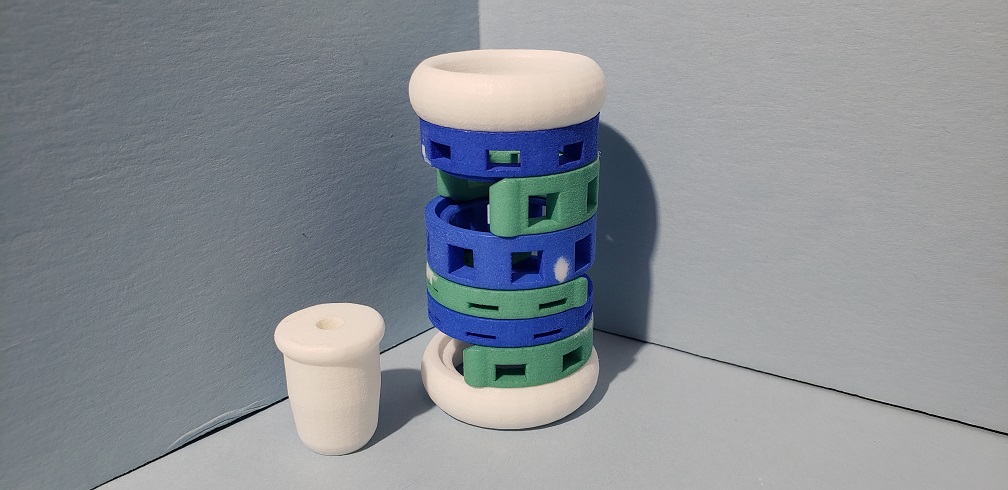
I then started getting the files printed professionally. I do not recall taking pictures of the first set to arrive (probably just TOSSED THEM ON within 5 mins!). But here is a picture of the final product of the various iterations in the design (for some of the basic components of the MetaMoreFore! (Blue = “Set Rings,” Green = “Expansion Rings,” White = Top and Bottom “End Rings” and the Tensioning plug).
[the below is FirstGen – MMF]
After the initial release of the MMF, I got LOADS of great feedback and those suggestions resulted in a few very minor edits to the CAD design
- Make the “pass through” space of the Expansion Rings(Green) a tad wider
- Make the edges of the “pass through” margins of the Expansion Rings (Green) rounded
- I also decided to add “void spaces” in the rings so as to reduce material costs
[the below is SecondGen – MMF]
The rest of the Components of the MetaMoreFore (linked) can be found on this website.
So, to bring this full circle. What started out as a “side project” (the ELID) about 5 years ago (~2013)…
resulted in the design of these “3D” printed components (basically, a “3D” printed ELID)…
but WAY SO MUCH MORE!!!!
~2017-2018
THE RE-BIRTH OF THE DILE!!!
The only other notable “milestone” had to do with the design of the “bi-directional” approach. This approach needed a “glans pusher” that had to remain inside the skin tube (and as such need a hole in it as a conduit to allow urine to flow out through the skin tube). After much trial and error I developed the below Glans Cap (which requires the use of the Push Pistons – shown elsewhere on this website).
This “bi-directional” configuration was useful and then…
a second LIGHTENING BOLT of inspiration hit me!
PERHAPS I COULD USE THIS SAME APPROACH (CAD and 3D printing) and this Glans Cap to redesign and reintroduce the DILE (Dual-action Incremental Longitudinal Expander; the first “bi-directional” foreskin restoration device) that I had first introduced to the restoration community back in 1998!
I then started work on the 20th Anniversary DILE (which I called the “Omega” – since it will be the last redesign I will ever do!). The DILE (Omega version; ver. 1.0), which was released on Jan 1, 2018, 20 years since its first release to the restoration community can be found here:
www.dileinsert.com